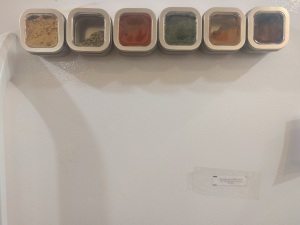
I recently went over to my friend Mary’s house and saw her lovely magnetic spice jar collection, and I thought — wow, I should do something like that. I recently read the Marie Kondo book about how to keep your house clean, and while I don’t do everything she suggests, one thing really stuck with me: if you make things more accessible and easy to put away, you’re more likely to use things and actually put them away.
So I’ve noticed that if I don’t have things in front of me, especially in the kitchen, I won’t use them. It’s how I end up buying a variety of grains and…not actually using them until 4-5 months later. Eeep!
To remedy this with spices, I decided to take on the magnetic spice jar, but instead of sticking it into my cabinet like I’ve seen on pintrest, I figured I have a giant metal box (my fridge) in my kitchen, why not use that? Now Mary told me she got her jars from Ikea, but I didn’t have time to go to Ikea, so I just ordered some on Amazon and paid a visit to home depot for some epoxy glue, sandpaper, and neodymium magnets.
Nerd thoughts: Neodymium magnets are basically super strong magnets that are used in gadgets that require permanent magnets that are crazy hard to demagnetize (i.e. some motors, etc). Neodymium is a rare earth metal with the atomic number 60. When I say ‘rare earth metal’ I don’t mean that it is hard to find, but rather that these metals are generally found together and difficult (or rare <– of way of saying difficult) to isolate. It’s ionic form has been used to color glass, make lasers, and of course (along with iron and boron) to make super strong magnets.
This project is super easy, takes around 30 minutes from prep to clean up and about 24 hours of drying time. Try it out, and make it easier to grab some spice for your food.
DIY Magnetic Spice Jars
What you need
- Small Neodymium magnets, about three per jar. You could use just two, or even one, since they are pretty strong. The size you get is really dependent on the the size of the jar you use and what your hardware store has to offer
- Metal Jars, I bought these from amazon
- Epoxy
- Toothpicks
- Sandpaper, doesn’t matter the grit
- Paper towel
- Gloves
- Lay down some disposable newspaper or paper towels and gather all your equipment in one place and put on your gloves.

gathered!
- Sand the back of your containers, this will allow the epoxy to stick better

Sanded
- Squeeze out a small dollop of epoxy on the back of each one, and make sure that the epoxy components are mixed well with your toothpick.

- Use your toothpick to pick up and spread three separate sections of epoxy on the back of the jar.

- Place the magnets in the epoxy pools.

- Allow to dry for 24 hours and remove any excess epoxy at that time.

- Fill and you’re ready to go!