It’s always made me a little bit sad that we don’t receive as much as people did “in the old days.” Now it’s just bills, ads, and the occasional notice of some kind. That’s part of what holidays and birthdays so special…checking the mail to see that, lo and behold, people that you don’t necessarily see everyday love you, and took the time to write words for you, put a stamp on an envelope and stick a card in the mailbox.
I love getting cards, so I send them. I try to remember the birthday/anniversary/big event of everyone close to me and send them a card, because I know I love it, so I am presumptuous enough to think they do too.
I’m not a genius of course, I use this site to help me remember these things, and it works wonderfully.

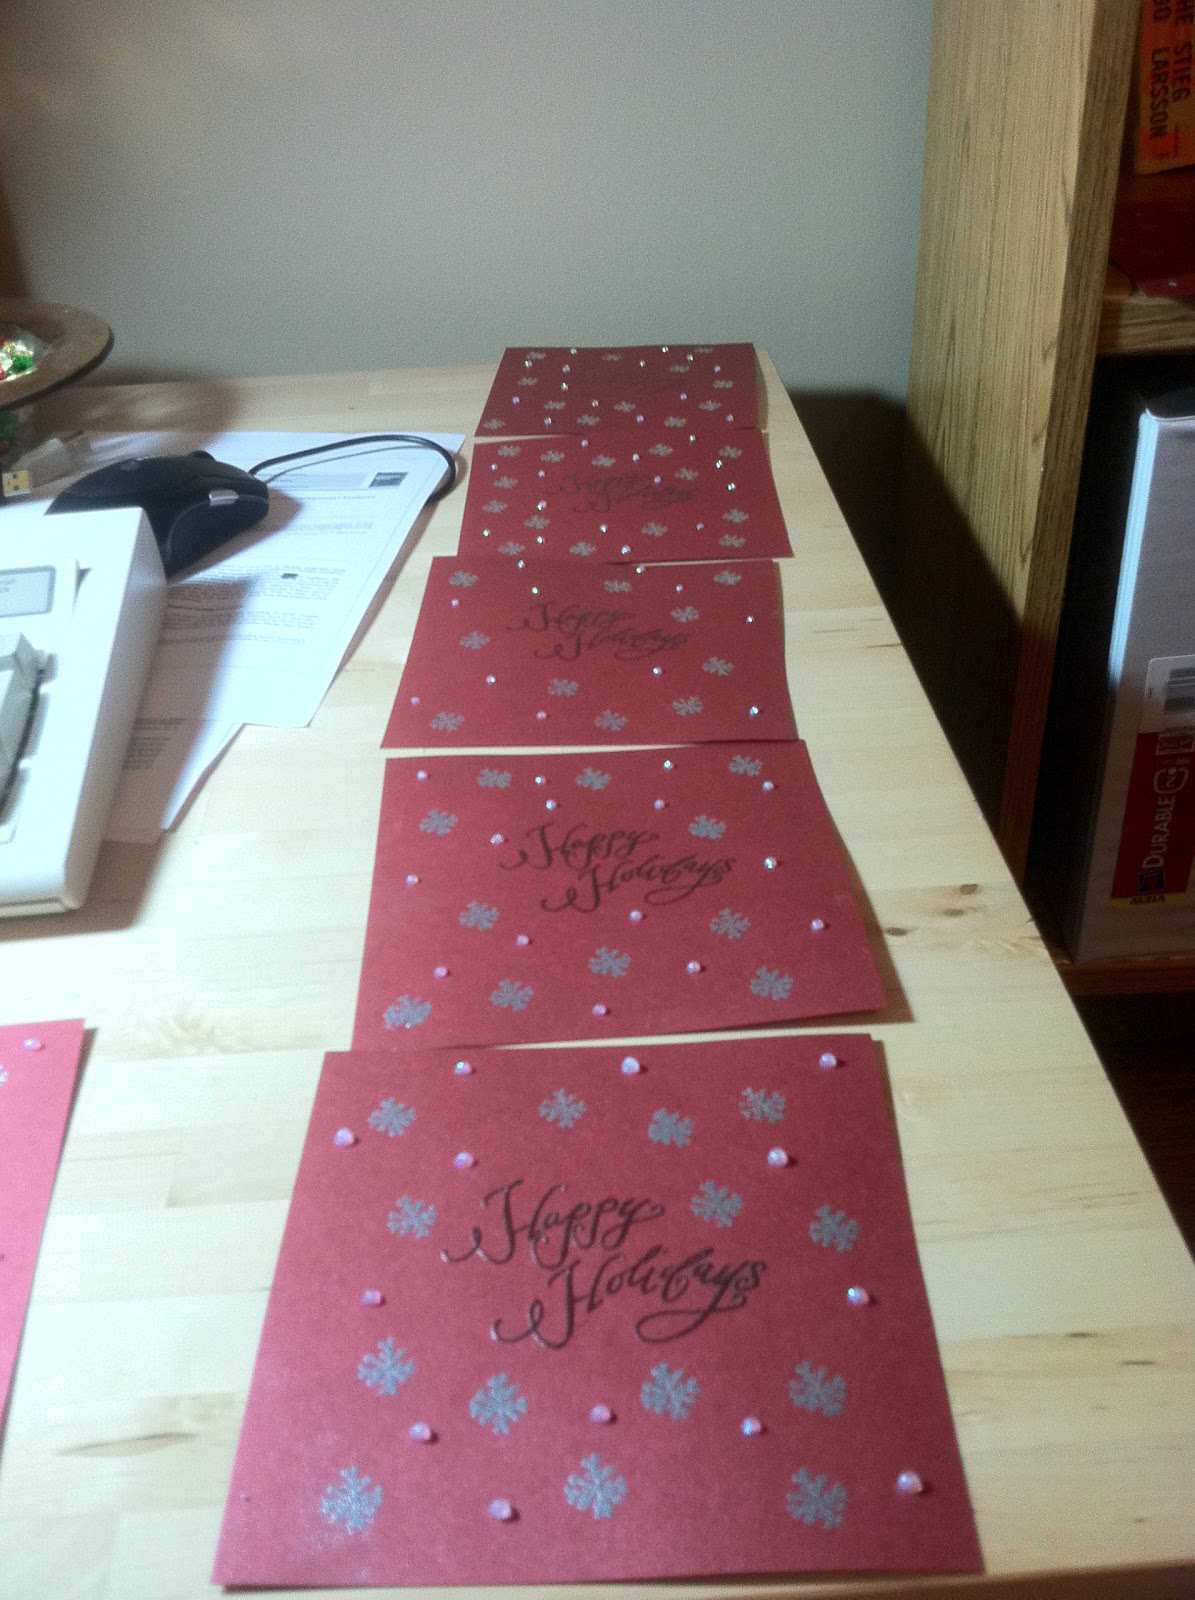
Anyways, if you’re thinking of sending holiday cards this season, consider making them at home for a few reasons:
1. While there is an initial investment, it’s cheaper overall.
2. It adds a bit of a personal touch to your cards, which is always nice to see. Plus, they’re unique!
3. It’s fun–get your girlfriends, or force your husband as in my case, to help you…they can make their own cards! Put on a movie, a plate of cookies nearby, and dooooo it.
Okay, so here are the basics you need:
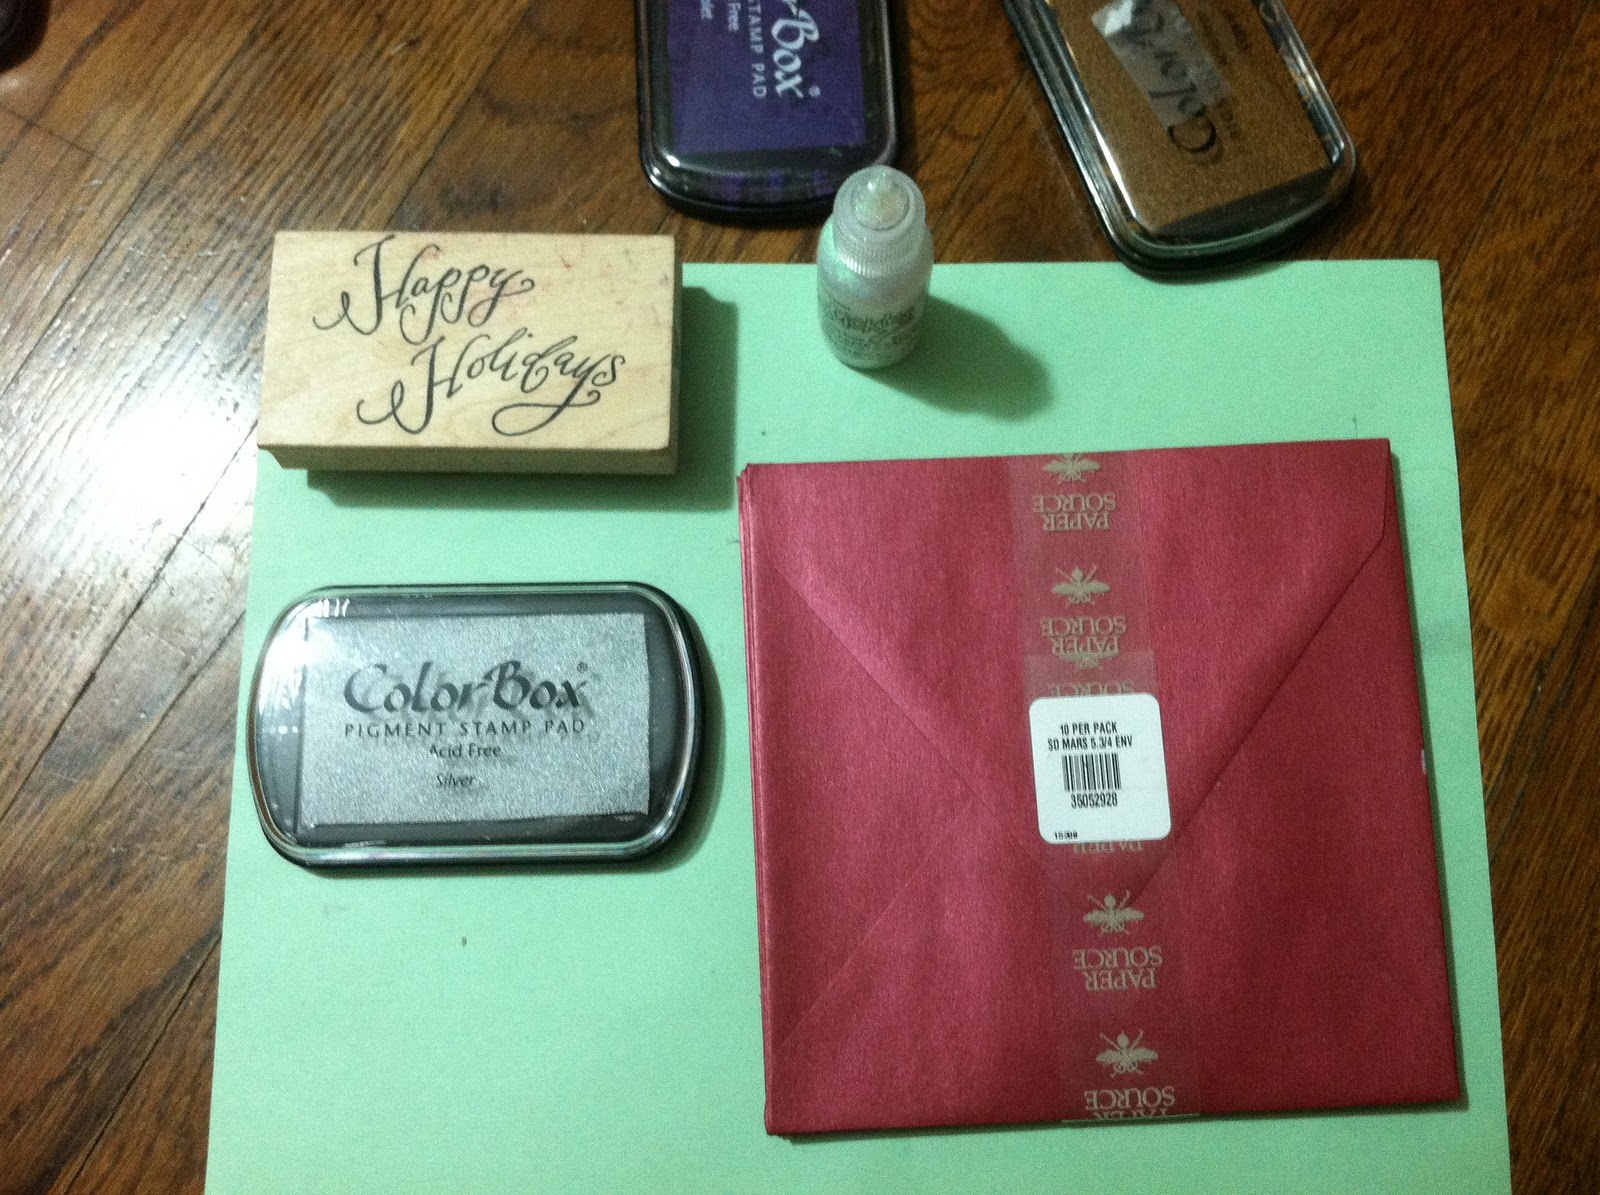
- 2 color ink pads, he
- I use the brand “color box,” more expensive, but the colors come out beautiful
- Estimated Cost: $12
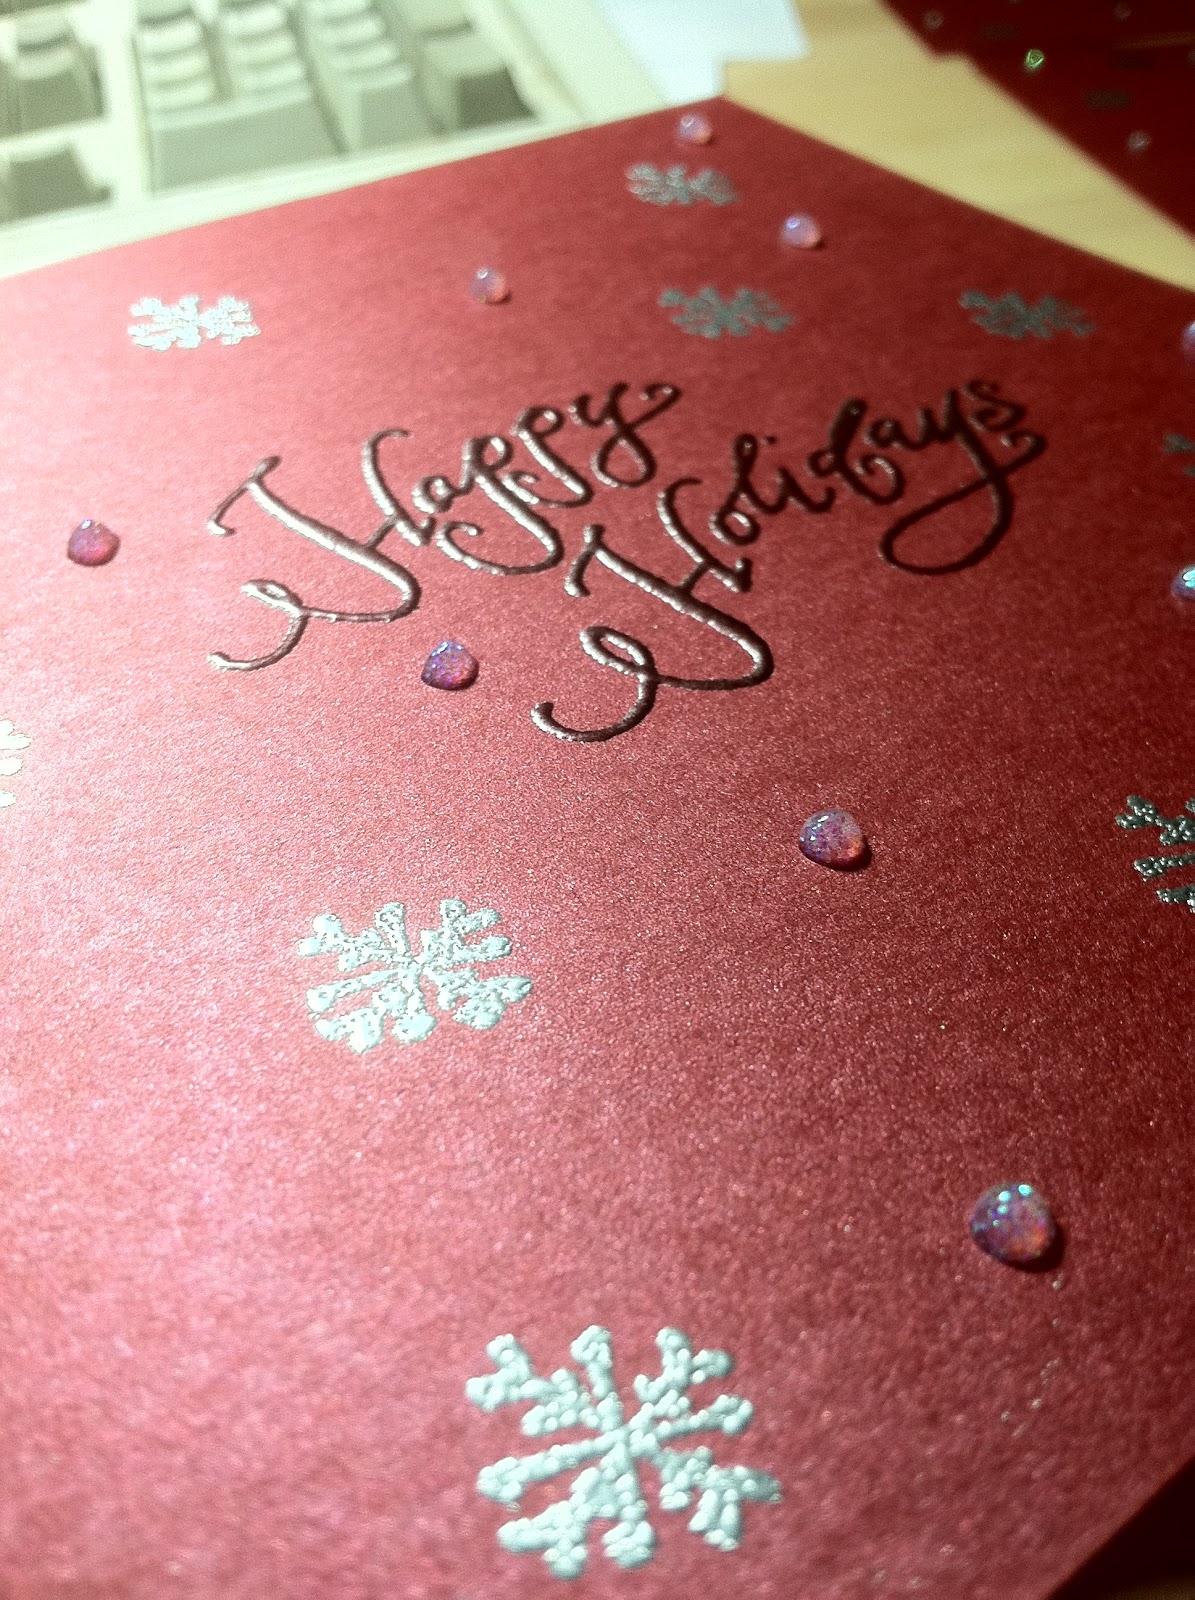
- 1-2 Stamps
- I used ones that said Happy Holidays and another was a small snow flake
- Estimated Cost: $6
- Glitter glue
- I use clear, it goes well with everything
- Estimated Cost: $2
- Cards + Envelopes, any color you want
- I used sparkly red, but in the past I’ve used lavender purple, green, etc.
- Estimated Cost: Depends on the brand you get, and how many
 |
| An embosser and powder. Seriously, it’s awesome. |
 |
| My Mess |
